Decorative Fondant Flower Techniques
Highlighted under: Cake Recipes | Birthday Sweets
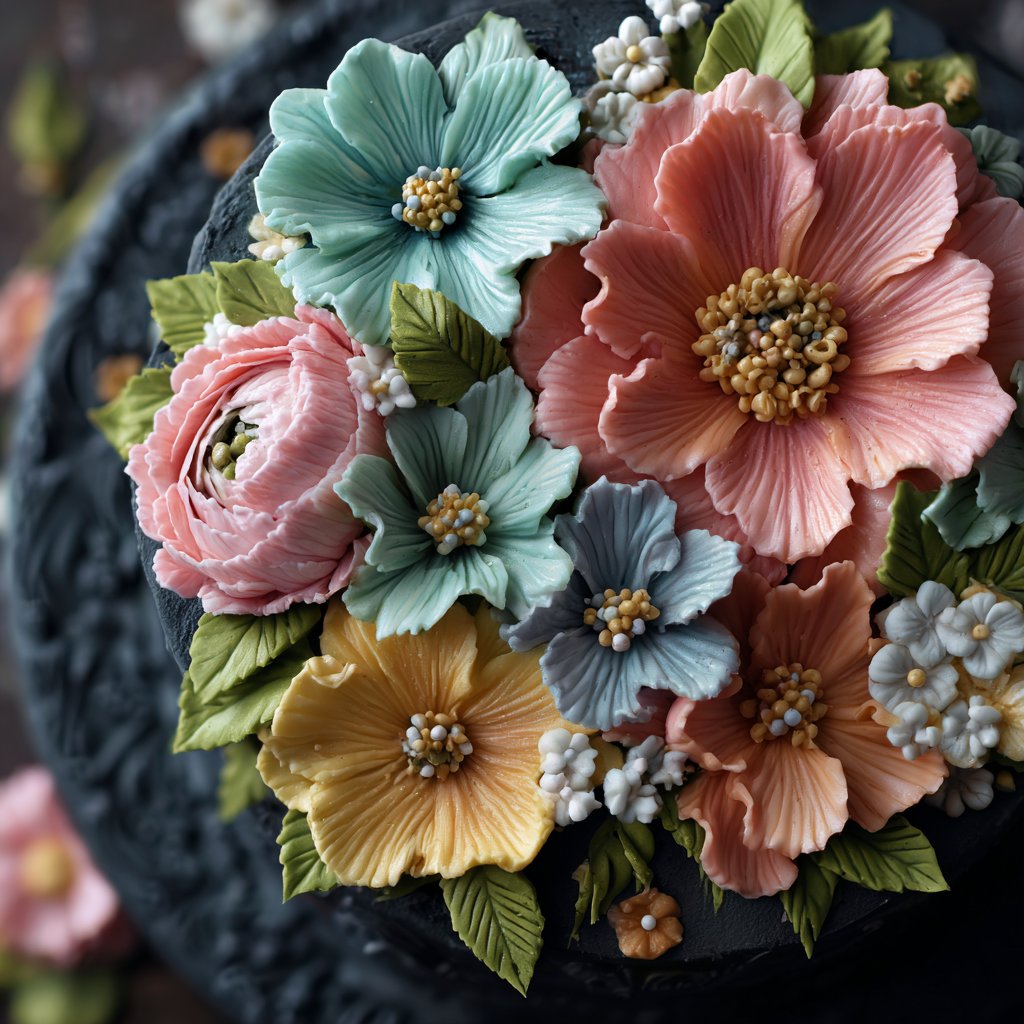
I absolutely love working with fondant, especially when it comes to creating beautiful decorative flowers! There’s something incredibly satisfying about transforming simple ingredients into stunning edible art. From roses to daisies, each technique teaches us how to manipulate fondant into delightful shapes and colors. I've spent countless hours perfecting these methods, and I'm excited to share my favorite tips to elevate your cake decorating game! Whether you’re a beginner or an experienced pastry chef, these techniques will inspire you to add a personal touch to your desserts.
When I first started creating fondant flowers, I was overwhelmed by the various techniques and tools available. However, through trial and error, I discovered that simplicity often yields the most stunning results. Using just a few basic tools, I was able to create intricate blooms that captivated my friends and family. For a beginner, I recommend starting with easier shapes, like daisies, before moving on to more complex flowers like peonies.
One memorable occasion was a friend's wedding, where I decorated the cake with my fondant flowers. Watching their faces light up made all the practice worthwhile! A key tip I learned is to let the fondant dry slightly before shaping it to ensure better control and easier handling. Never underestimate the power of patience in achieving beautiful details!
Why You'll Love These Techniques
- Unleash your creativity with endless decoration possibilities
- Perfect for personalizing cakes for special occasions
- Transform basic cakes into elegant masterpieces
Understanding Fondant
Fondant is a versatile sugar paste that provides a smooth and polished finish for cakes and pastries. When selecting fondant, consider whether to use pre-made or homemade options—homemade fondant allows for customizable texture and flavor, which can enhance the overall aesthetic of your flowers. If opting for ready-to-use fondant, ensure you choose a quality brand for the best results. Proper kneading is critical; it should be soft yet firm enough to hold intricate shapes without cracking.
Adding colors to fondant can even further personalize your creations. Use gel food coloring for vibrant hues, as less moisture is introduced compared to liquid coloring. Always start with a small amount, kneading thoroughly, until the desired shade is achieved. Remember, darker colors may require more kneading, which can lead to fatigue. If you find the fondant getting too sticky during kneading, a minimal amount of cornstarch can help restore a workable consistency.
Mastering Flower Petal Techniques
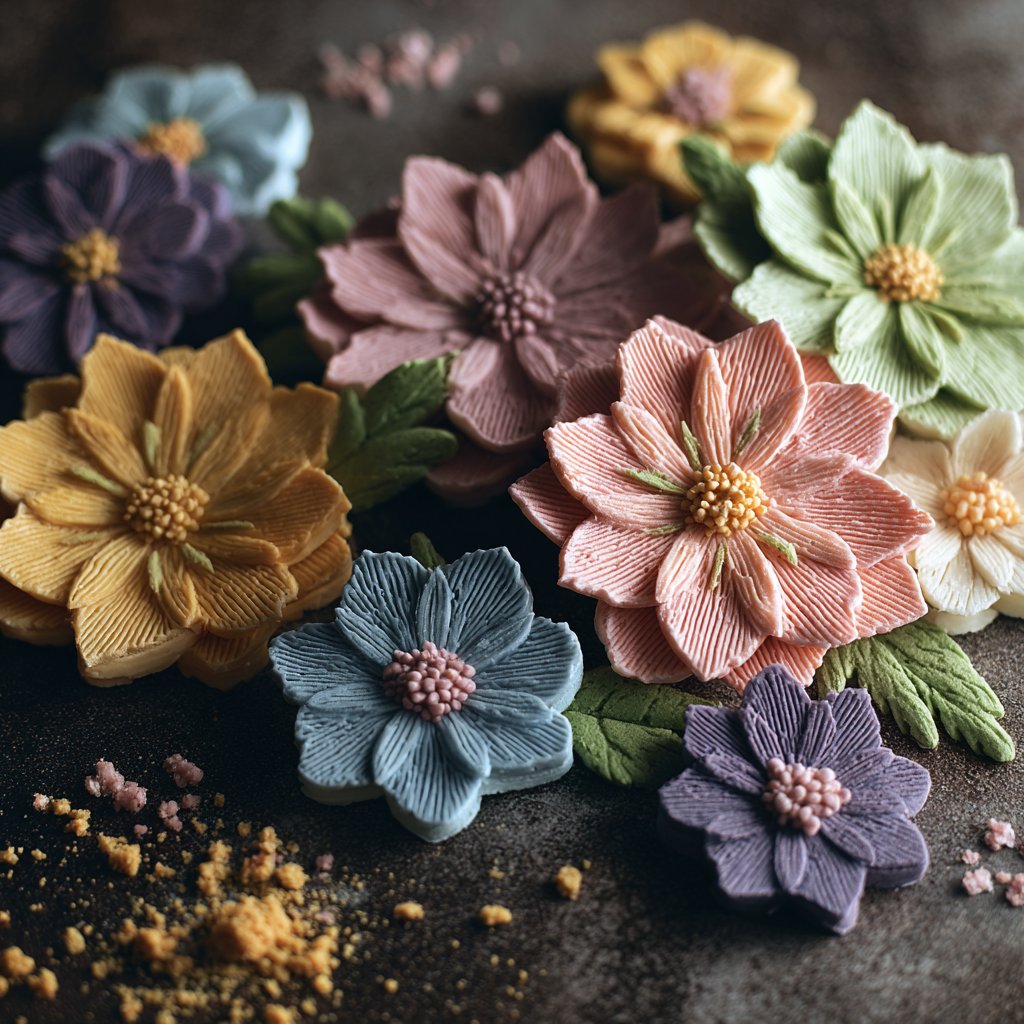
When shaping the petals, I recommend using a petal veiner tool—it can create impressive textures that mimic real flower petals, enhancing their visual appeal. Apply light pressure while veining to avoid crushing the fondant too much, which will help maintain a delicate appearance. Additionally, consider varying the thickness of the petals; thinner edges can create a more lifelike flower, while rounded or broader shapes offer fuller blooms.
Adhesion between petals is crucial for constructing stable flowers. While brushing water onto the edges of the petals may seem effective, I prefer using a clean, damp brush to apply the adhesive precisely. This prevents excess water from seeping into the fondant, which can lead to a sticky, less firm flower. Allow assembled flowers to dry in a cool, dry place for at least a few hours; overnight drying can ensure they hold their shape even better and are easier to work with.
Creative Variations and Storage
Once you’re comfortable with the basic techniques, experiment with different flower types or color schemes. Combining various shapes, such as daisies and roses, can create unique bouquets perfect for any cake design. Adding elements like edible pearls, leaves, or glitter can further personalize your decorating style. My favorite is adding a touch of luster dust to finished flowers to create a stunning shimmer under cake lights.
If you find yourself with leftover fondant flowers, they can be stored for future use. Place them in an airtight container, away from direct sunlight, to prevent color fading. Storing in a cool environment can extend their longevity. However, keep in mind that while fondant decorations can stay intact for weeks, ideally, they should be applied to cakes within a few days for the freshest look. When making flowers ahead of time, avoid attaching them to a cake until just before serving for optimal appearance.
Ingredients
To create your fondant flowers, you'll need the following ingredients:
Fondant Ingredients
- Ready-to-use fondant or homemade fondant
- Edible food coloring
- Cornstarch (for dusting)
- Water (for adhesive)
Gather these ingredients, and you're ready to bring your floral creations to life!
Instructions
Follow these steps to craft your decorative fondant flowers:
Prepare the Fondant
Knead the fondant until it's pliable. Add food coloring as desired and knead until the color is evenly distributed.
Roll Out the Fondant
On a surface dusted with cornstarch, roll out the fondant to about 1/8 inch thickness. Keep it even to ensure uniform flowers.
Cut Flower Shapes
Using flower cutters, cut out shapes from the rolled fondant. Start with simpler shapes before tackling more complex designs.
Shape the Petals
Gently mold and shape each flower petal using a petal veining tool to add texture and dimension.
Assemble the Flower
Use a small amount of water as adhesive to attach the petals together, forming your flower structure. Allow it to dry to hold its shape.
Finishing Touches
Once the flowers are dry, add additional decorations like edible dust or glitter to make them pop.
Now your decorative fondant flowers are ready to adorn your cakes!
Pro Tips
- Practice is crucial for mastering fondant techniques. Don’t be discouraged if your first flowers don't turn out perfectly
- every attempt is a step towards improvement!
Troubleshooting Common Issues
One common issue when working with fondant is cracking, which often occurs when the fondant is either too dry or rolled too thin. To fix this, try using a few drops of water to soften the area gently, followed by additional kneading until pliable. If you plan to work on delicate flower petals, ensure the fondant remains covered with plastic wrap when not in use to avoid drying out.
Sometimes, your fondant may be too sticky to handle; this typically happens in humid conditions. If you find this occurs, dust your work surface and rolling pin with cornstarch to minimize stickiness. Applying a small amount of vegetable shortening to your hands can also help when shaping smaller details. If none of these fixes work, consider refrigerating the fondant for about 20 minutes to firm it up before retrying.
Scaling Up for Larger Projects
If you're planning a large event, such as a wedding or a big birthday celebration, it’s helpful to know how to scale your fondant flower production. For multiple flowers, prepare larger batches of fondant, adjusting your color quantities accordingly. You can create a timeline for when to make each flower type based on their drying time, grouping simpler flowers to make while waiting for more detailed designs to set.
When doubling your flower count, ensure you still give each piece the attention it deserves. Consider designating flower-making days or sessions spread out over the week leading up to the event. This approach can prevent last-minute scrambling and allows you to enjoy the creative process, focusing on details as you work through each flower type.
Questions About Recipes
→ Can I make fondant flowers in advance?
Yes! Fondant flowers can be made several days in advance. Just store them in a cool, dry place to maintain their shape.
→ What types of cakes are best to decorate with fondant flowers?
Fondant flowers are great for any cake! They particularly complement buttercream and fondant-covered cakes.
→ Can I use regular food coloring for my fondant flowers?
For the best results, use gel or paste food coloring as it won’t alter the consistency of your fondant.
→ What should I do if my fondant is too sticky?
If your fondant is sticky, knead in a little cornstarch until it reaches a smooth, workable consistency.
Decorative Fondant Flower Techniques
Created by: The Chefmariecooks Team
Recipe Type: Cake Recipes | Birthday Sweets
Skill Level: Intermediate
Final Quantity: Serves many
What You'll Need
Fondant Ingredients
- Ready-to-use fondant or homemade fondant
- Edible food coloring
- Cornstarch (for dusting)
- Water (for adhesive)
How-To Steps
Knead the fondant until it's pliable. Add food coloring as desired and knead until the color is evenly distributed.
On a surface dusted with cornstarch, roll out the fondant to about 1/8 inch thickness. Keep it even to ensure uniform flowers.
Using flower cutters, cut out shapes from the rolled fondant. Start with simpler shapes before tackling more complex designs.
Gently mold and shape each flower petal using a petal veining tool to add texture and dimension.
Use a small amount of water as adhesive to attach the petals together, forming your flower structure. Allow it to dry to hold its shape.
Once the flowers are dry, add additional decorations like edible dust or glitter to make them pop.
Extra Tips
- Practice is crucial for mastering fondant techniques. Don’t be discouraged if your first flowers don't turn out perfectly
- every attempt is a step towards improvement!
Nutritional Breakdown (Per Serving)
- Calories: 150 kcal
- Total Fat: 2g
- Saturated Fat: 1g
- Cholesterol: 0mg
- Sodium: 5mg
- Total Carbohydrates: 34g
- Dietary Fiber: 0g
- Sugars: 28g
- Protein: 1g